Valve guides are essential engine components that direct valve stems, preventing oil leakage and ensuring proper sealing․ They are typically made of durable materials like bronze or steel for longevity․
1․1 What Are Valve Guides?
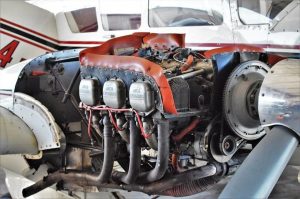
Valve guides are cylindrical components located in the cylinder head of an internal combustion engine․ They serve as the pathway for the valve stems, ensuring proper alignment and movement․ By maintaining precise clearance, valve guides prevent excessive wear and oil leakage into the combustion chamber․ Typically made from durable materials like bronze or steel, they withstand high temperatures and friction․ Their primary role is to guide the valves accurately, ensuring efficient engine performance and longevity․ Over time, valve guides may wear out, leading to issues like oil consumption and reduced engine efficiency․ Replacing them is crucial for maintaining optimal engine functionality and preventing further damage․
1;2 Importance of Valve Guides in Engine Performance
Valve guides are critical for maintaining optimal engine performance by ensuring proper valve alignment and preventing oil leakage․ They regulate engine vacuum, which directly impacts efficiency and power output․ Worn guides can lead to increased oil consumption, reduced performance, and potential engine damage․ Properly functioning guides ensure precise valve movement, maintaining efficient combustion and minimizing wear on moving parts․ They also prevent contamination of combustion areas by oil, which can degrade engine performance․ Over time, worn guides can cause costly repairs, making their replacement essential for sustaining engine reliability and efficiency․

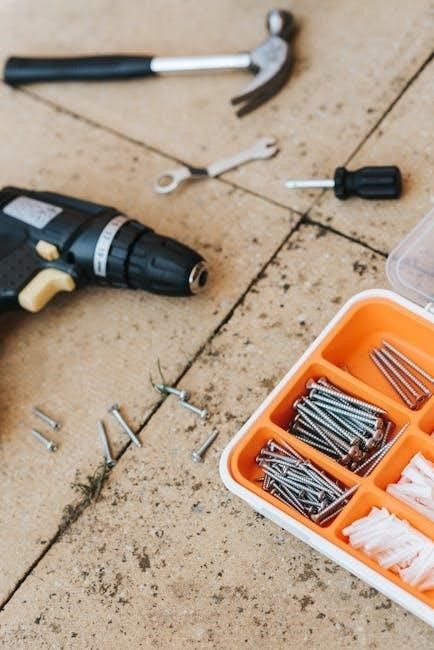
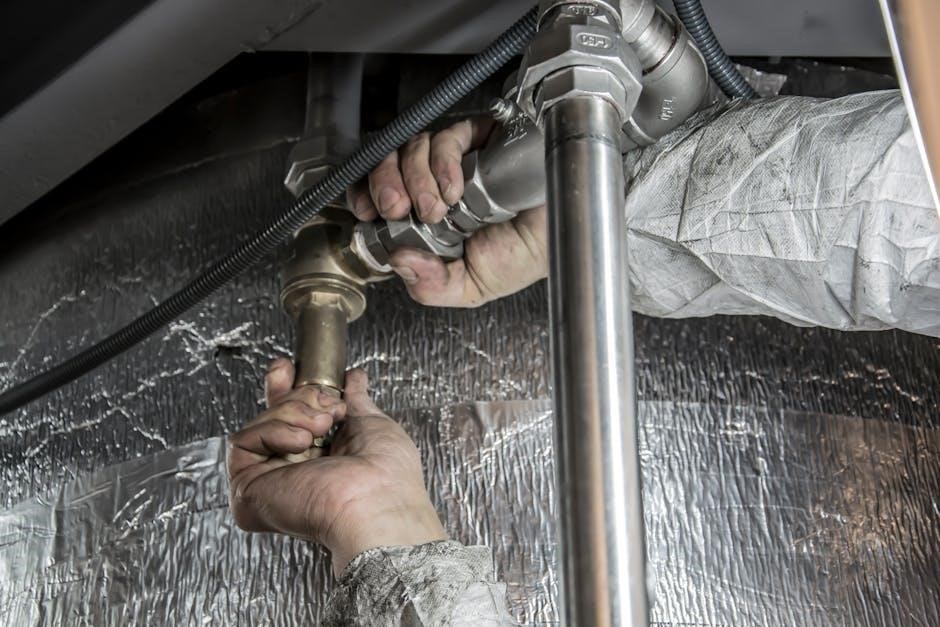
Tools and Materials Needed
Specialized tools like valve guide drifts, reamers, and presses are essential for removing and installing guides․ A heat source, lubricants, and high-temperature grease are also necessary․
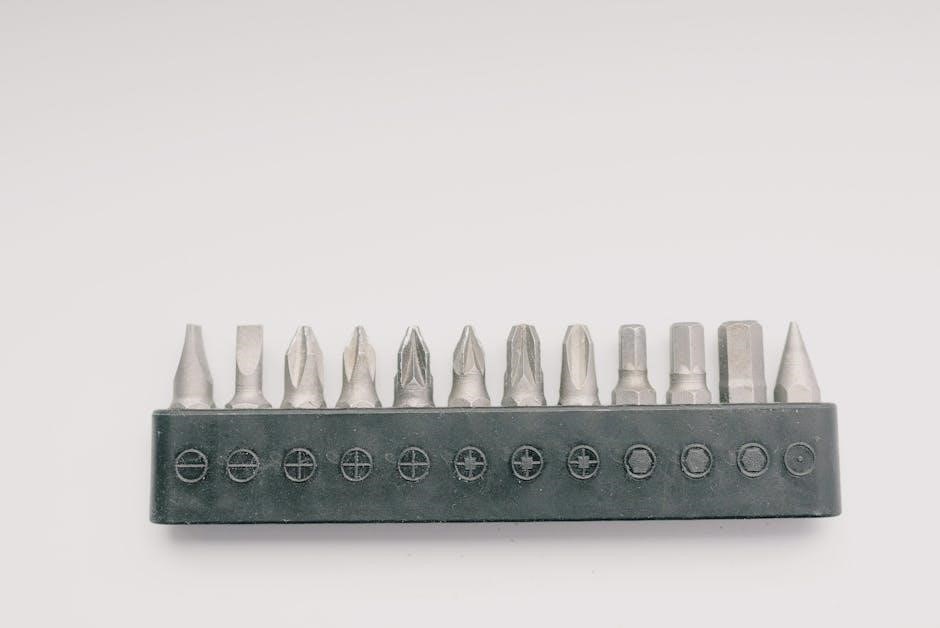
2․1 Specialized Tools for Valve Guide Installation
Specialized tools are crucial for successful valve guide installation․ A valve guide drift ensures proper alignment, while a reamer maintains precise guide bore sizing․ A press or driver facilitates smooth installation without damage․ Additionally, a heat source like a heat gun is necessary to expand the cylinder head, aiding in guide fitting․ Lubricants and high-temperature grease prevent friction and wear during insertion․ These tools are designed to handle the precision required for engine repairs, ensuring accurate fitment and preventing damage to surrounding components․ Proper tool selection guarantees a professional-grade installation, maintaining engine performance and longevity․ Always use tools specifically designed for valve guide replacement to avoid complications․
2․2 Essential Materials for the Job
The materials needed for valve guide installation are critical for a successful replacement․ New valve guides, compatible with your engine, are the primary component․ High-temperature grease is applied to the guides to reduce friction and prevent wear․ Never-Seize compound is used on the guide’s exterior to ensure proper seating and prevent galling․ Engine oil and cleaning solvents are essential for lubricating and cleaning the area․ A specialized drift aligns the guides accurately, while reaming tools adjust the guide bore for a precise fit․ These materials ensure a smooth installation process and optimal engine performance․ Proper selection guarantees durability and prevents future issues․
Preparing the Engine
Preparing the engine involves removing the cylinder head and cleaning the area around the valve guides to ensure a smooth installation process․
3․1 Removing the Cylinder Head
Removing the cylinder head is a critical step in accessing the valve guides․ Start by draining the cooling system and disconnecting all connected components, such as hoses and wiring․ Use a torque wrench to remove the head bolts in a star pattern to prevent warping the head․ Once removed, carefully lift the head and place it on a stable, heat-resistant surface․ Heating the head to around 200°C can help loosen old valve guides․ Clean the area thoroughly to prevent debris from interfering with the installation process․ This step requires precision and care to avoid damaging the head or surrounding components, ensuring a smooth guide replacement process․
3․2 Cleaning the Area Around the Valve Guides
Cleaning the area around the valve guides is essential for a successful replacement․ Use compressed air and a solvent to remove dirt, oil, and old lubricant from the guide bores and surrounding surfaces․ Scrub the area with a wire brush to ensure a smooth, debris-free surface for the new guides․ Proper cleaning prevents contamination and ensures a precise fit․ After cleaning, inspect the area to confirm all debris has been removed․ A clean surface guarantees proper seating of the new guides, which is critical for maintaining optimal engine performance and preventing future issues․ This step is vital for the longevity and functionality of the valve train components․

Removing Old Valve Guides
Removing old valve guides involves precise techniques like drilling, pressing, or heating to ensure safe extraction without damaging the cylinder head or surrounding components․ Specialized tools are essential․
4․1 Methods for Extracting Old Guides
Several methods are used to remove old valve guides, including drilling, pressing, and heating․ Drilling involves creating holes along the guide’s length for easy extraction․ Pressing uses specialized tools to push out the guide gently․ Heating the head and cooling the guide creates contraction, making removal easier․ Each method requires precision to avoid damaging the surrounding engine components․ Proper technique is essential for a successful replacement process․ Specialized tools like a drift or reamer may also be employed to ensure safe extraction without causing damage․ These methods vary in complexity but all aim to remove old guides effectively․
4․2 Common Challenges and Solutions
Common challenges when removing old valve guides include stuck guides, improper alignment, and damage to surrounding areas․ Stuck guides can be loosened by applying heat or using penetrating oil․ Improper alignment can be avoided with specialized tools that ensure precise positioning․ Damage to the cylinder head or nearby components can be minimized by using the correct tools and techniques․ Lubrication and careful handling are key to overcoming these challenges effectively․ Ensuring the workspace is clean and well-prepared also helps prevent complications․ By addressing these issues proactively, the replacement process can proceed smoothly, maintaining engine integrity and ensuring optimal performance․
Installing New Valve Guides
New valve guides are installed by heating the cylinder head and carefully aligning the guide using a drift․ Proper fitting ensures smooth valve operation and prevents wear․
5․1 Aligning and Fitting the New Guides
Aligning and fitting new valve guides requires precision to ensure proper operation․ Start by heating the cylinder head to 200°C to allow metal expansion․ Use a specialized drift to align the guide with the valve seat, ensuring accurate placement․ Once fitted, check that the guide is square to the seat to maintain correct valve clearance․ Proper alignment prevents wear and ensures smooth engine operation․ Apply a thin layer of high-temperature grease to the new guide for lubrication․ Ensure the guide is seated securely without force, as improper fitting can lead to engine damage․ This step is critical for optimal performance and longevity․
5․2 Adjusting Valve Stem-to-Guide Clearance
Proper clearance between the valve stem and guide is crucial for optimal engine performance․ After installation, use a dial indicator or feeler gauges to measure the clearance, ensuring it meets manufacturer specifications․ If the clearance is too tight or loose, adjust or replace the guide as needed․ Proper alignment and fitting during installation help maintain accurate clearance․ Lubricate the valve stem with high-temperature grease to reduce friction and prevent overheating․ Correct clearance prevents excessive wear, oil leakage, and potential engine damage․ Always consult the engine manual for specific clearance requirements, as improper adjustment can lead to poor performance and costly repairs․

Reassembling and Testing
After installing the new valve guides, carefully reattach the cylinder head, ensuring all components are clean and properly aligned․ Perform a leak test to confirm proper sealing and functionality․
6․1 Reattaching the Cylinder Head
Reattaching the cylinder head is a critical step in the valve guide installation process․ Ensure all components are clean and properly aligned before tightening․ Use a torque wrench to secure the head bolts in the correct sequence, following the manufacturer’s specifications․ Apply a thin layer of lubricant to moving parts to prevent wear and ensure smooth operation․ Double-check the valve train for proper clearance and function․ Proper alignment and torque are essential to maintain engine performance and prevent damage․ Always handle hot components with care, using heat-resistant gloves and ensuring proper ventilation․ This step requires precision to guarantee optimal engine functionality and longevity․
6․2 Performing a Leak Test
After reassembling the engine, a leak test is essential to ensure the valve guides are properly sealed․ Use a pressure test kit to check for air or fluid leakage around the guides․ Visually inspect the area for any signs of oil droplets or coolant seepage․ If leaks are detected, re-examine the guide installation and seating․ Proper sealing is critical to prevent engine damage and maintain optimal performance․ This step ensures the valve guides function correctly and provides peace of mind after the replacement process․ A successful leak test confirms the installation’s integrity and readiness for normal engine operation․

Safety Precautions
Always handle hot engine components with care, use heat-resistant gloves, and ensure proper ventilation․ Wear protective gear like goggles and gloves to prevent injuries and ensure a safe working environment․
7․1 Handling Hot Engine Components
Handling hot engine components requires extreme caution to avoid burns․ Always use heat-resistant gloves and tongs when touching heated parts․ Allow components to cool slightly before handling, as extreme heat can cause severe injuries․ Ensure proper ventilation to prevent inhaling harmful fumes․ Keep a fire extinguisher nearby and maintain a clear workspace free of flammable materials․ Never rush when dealing with heated components, as this increases the risk of accidents․ Prioritize safety by using the right tools and protective gear to minimize direct contact with hot surfaces․ Cooling components before handling is essential to prevent burns and ensure a safe working environment․
7․2 Using Protective Gear
Using protective gear is crucial when working with engine components to ensure personal safety․ Always wear heat-resistant gloves to prevent burns and provide grip when handling tools․ Safety glasses or goggles are essential to protect your eyes from debris or chemical splashes․ A face mask can prevent inhalation of harmful fumes or particles during grinding or cleaning․ Additionally, tie back long hair and avoid loose clothing to prevent accidents․ Proper protective gear minimizes risks and ensures a safe working environment․ By prioritizing safety, you can focus on the task without compromising your well-being․ Always inspect your gear for damage before use and replace it as needed․ Safety should never be overlooked during engine repairs․

Selecting the Right Valve Guides
Choosing the right valve guides involves considering material, diameter, and length to match your engine’s specifications․ Always consult the manufacturer’s guidelines for precise measurements․
8․1 Considerations for Material and Fit
When selecting valve guides, material and fit are critical for optimal performance․ Bronze guides are preferred for their durability and heat resistance, while steel guides are lightweight and corrosion-resistant․ Proper fit ensures the guide aligns perfectly with the valve stem, maintaining precise clearance to prevent excessive wear or restricted movement․ Always measure the engine’s specifications accurately to match the guide’s diameter and length․ Using high-quality materials and ensuring a snug fit prevents oil leakage and maintains engine efficiency․ Proper fitment also reduces the risk of premature wear, ensuring smoother engine operation and extending the lifespan of the valve train components․
8․2 Choosing Reputable Manufacturers
Selecting valve guides from reputable manufacturers ensures durability and performance․ Brands like ARP, Ferrea, and Victor Reinz are known for high-quality materials and precision engineering․ These manufacturers offer guides designed to withstand high engine temperatures and provide optimal fitment․ When choosing, consider compatibility with your engine’s specifications and the manufacturer’s reputation for reliability․ Consulting forums, repair manuals, and expert recommendations can help identify trusted brands that meet your needs․ Investing in guides from well-known manufacturers ensures a long-lasting repair and maintains your engine’s performance and efficiency․ Always verify product specifications to guarantee compatibility and avoid costly modifications or future issues․
Cost and Time Estimates
Valve guide replacement costs range from $50 to $200 for parts and $300 to $1,000 for labor․ The process typically takes 6 to 12 hours․
9․1 Budgeting for the Replacement
Budgeting for valve guide replacement involves considering both parts and labor costs․ Valve guides themselves typically range from $50 to $200 per set, depending on quality and material․ Specialized tools, such as installers or drifts, may add $50 to $150 to the total cost․ Additionally, high-temperature grease, Never-Seize compound, and other materials can add $20 to $50․ For a DIY project, the total cost may range from $100 to $400․ However, if hiring a mechanic, labor costs can add $300 to $1,000, depending on the shop’s rates and the vehicle’s complexity․ It’s essential to consult repair manuals or a professional to get precise estimates for your specific engine․
9․2 Time Required for the Process
The time required to install valve guides varies depending on the mechanic’s experience and the engine’s complexity․ A DIY project typically takes 6 to 12 hours, while a professional shop may complete the job in 4 to 8 hours․ Factors influencing the duration include the need for additional repairs, such as cylinder head resurfacing or valve replacement․ Proper preparation, like cleaning and preheating, can significantly reduce installation time․ Skilled mechanics may work faster, but novices should allocate more time to avoid errors․ Planning for potential delays and having all tools ready ensures a smoother process․ Proper time allocation is crucial for a successful replacement․